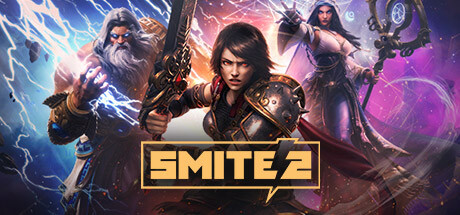
This is the original SMITE, the third person MOBA Hi-Rez and Titan Forge launched out of beta on 25 March 2014 and later put on Steam. Its roster closed at 130 gods, finishing with the Egyptian sky goddess Nut in Year 11, after which all new content moved to SMITE 2. The servers are still up and matches still fill, but the game sits in maintenance mode, so what follows describes a settled game rather than a moving one.
Combat in SMITE rewards knowledge over reflexes. Understanding how each mechanic works (and how they interact) is what turns a struggling player into a dominant one. New here? Start with our beginner's guide for the basics.
Core Combat Mechanics
1. Physical and Magical Power
SMITE 1 splits damage into Physical Power and Magical Power, each with its own penetration and its own protection stat. Every god and every item sits on one side of that split, and it is the clearest structural difference from SMITE 2's Strength and Intelligence.
Why it matters: This is the foundation of all combat. Everything else builds on this.
2. Relics as free actives
Relics are free active abilities on their own cooldowns, held separately from your six item slots. You unlock one at level 1 and a second at level 12, and Purification Beads cleansing crowd control or Aegis Amulet's 1.5 seconds of invulnerability decide more fights than most item passives.
Why it matters: The most underrated mechanic. Players who master this early have a massive advantage.
3. Third person aiming
The camera sits over your god's shoulder, so most abilities are aimed by hand and every projectile has travel time. You cannot see behind yourself, which is why the jungle functions as a threat rather than as a safe farming route.
Why it matters: Unlocks a new layer of gameplay depth once understood.
4. Conquest objectives
Conquest runs three lanes plus a jungle, with Gold Fury on the long lane side and Fire Giant on the short lane side. Oracle Furies sit across from the Gold Fury and spawn 35 seconds into the match, and the mid camp behind Fire Giant is replaced by the Pyromancer 7 minutes in.
Why it matters: The tactical edge that separates average players from advanced ones.
5. Maintenance mode and the SMITE 2 handover
Nut was the 130th and last god added here. Hi-Rez moved development to SMITE 2 and left this game running, with Legacy Gems and the Divine Legacy event carrying account history across for players who link both accounts.
Why it matters: The endgame optimization mechanic. Small improvements here compound into massive gains.
How These Mechanics Combine
Understanding how mechanics interact is where real optimization happens:
Physical and Magical Power + Relics as free actives
SMITE 1 splits damage into Physical Power and Magical Power, each with its own penetration and its own protection stat. When combined with Relics as free actives, relics are free active abilities on their own cooldowns, held separately from your six item slots. This combination is the core of every effective build.
Third person aiming + Conquest objectives
The camera sits over your god's shoulder, so most abilities are aimed by hand and every projectile has travel time. Paired with Conquest objectives, conquest runs three lanes plus a jungle, with gold fury on the long lane side and fire giant on the short lane side. This is why the tier list favors builds that leverage both.
Maintenance mode and the SMITE 2 handover as a Multiplier
Nut was the 130th and last god added here. Hi-Rez moved development to SMITE 2 and left this game running, with Legacy Gems and the Divine Legacy event carrying account history across for players who link both accounts. This system amplifies everything else. The better your Maintenance mode and the SMITE 2 handover optimization, the more your other mechanics pay off.
Combat by Build
Each build approaches combat differently:
Mage (A-Tier)
Combat approach: Balanced combat style. Key equipment: Qin's Sais Primary mechanic: Physical and Magical Power
Mage offers a solid combat experience. Full setup in our builds guide.
Hunter (A-Tier)
Combat approach: Balanced combat style. Key equipment: Jotunn's Wrath Primary mechanic: Relics as free actives
Hunter offers a solid combat experience. Full setup in our builds guide.
Warrior (A-Tier)
Combat approach: Balanced combat style. Key equipment: Titan's Bane Primary mechanic: Third person aiming
Warrior offers a solid combat experience. Full setup in our builds guide.
Guardian (A-Tier)
Combat approach: Balanced combat style. Key equipment: Book of Thoth Primary mechanic: Conquest objectives
Guardian offers a solid combat experience. Full setup in our builds guide.
Assassin (A-Tier)
Combat approach: Balanced combat style. Key equipment: Sovereignty Primary mechanic: Maintenance mode and the SMITE 2 handover
Assassin offers a solid combat experience. Full setup in our builds guide.
Advanced Combat Techniques
Damage Optimization
- Match your equipment to your build's stat priorities
- Exploit Physical and Magical Power for maximum damage windows
- Chain Relics as free actives and Third person aiming for combo damage
- Use Conquest objectives to create openings
Survivability
- Learn enemy patterns before committing to attacks
- Buy your second relic the moment you hit level 12. It costs nothing, it sits on a cooldown separate from your items, and forgetting it removes an entire defensive option for the whole mid game.
- Position using Physical and Magical Power to control spacing
- Save defensive options for guaranteed survival, not comfort
Boss Combat
Bosses test your understanding of every mechanic. See our boss guide for fight-specific strategies.
- Phase awareness: Most bosses change behavior at health thresholds
- Patience over aggression: One extra hit per opening beats dying to greed
- Build preparation: Swap gear and equipment for specific fights when needed
Common Combat Mistakes
- Button mashing: Committed attacks have recovery frames. Mashing locks you into animations.
- Ignoring Relics as free actives: This mechanic exists for a reason. Players who use it take significantly less damage.
- Wrong equipment for the situation: Check our weapons guide for situational picks.
- Not learning from deaths: Every death teaches something. If you don't know why you died, you'll die the same way again.
- Overcommitting: Trading hits works in Conquest lanes but will get you killed in Arena, Joust and Assault maps.
More SMITE Guides
- SMITE SMITE Overview
- SMITE Best Builds
- SMITE Tier List
- SMITE Walkthrough
- SMITE Beginner's Guide
- SMITE Tips & Tricks
- SMITE Weapons Guide
- SMITE Boss Guide
- SMITE Maps & Locations
- SMITE Crafting Guide
- SMITE Classes & Characters
Similar Games
If you enjoy SMITE, check out these related guides:
- Dota 2 Combat Guide: moba game with similar mechanics
- Eternal Return Combat Guide: moba game with similar mechanics
- SMITE 2 Combat Guide: moba game with similar mechanics